> ## Documentation Index
> Fetch the complete documentation index at: https://docs.bolta.io/llms.txt
> Use this file to discover all available pages before exploring further.
# 웹훅 연결하기
> 웹훅을 연결해서 전자세금계산서 발행 상태 업데이트와 같은 변경 사항을 실시간으로 받을 수 있습니다.
웹훅은 테스트 환경과 라이브 환경 각각 별개로 등록해야 해요.
미리 생성된 API 키에 **발행 수신 URL**과 **리다이렉트 URL**을 설정할 수 있어요.
[API 키 생성 바로가기](/docs/developer-center/api-key)
# 1. API 키 선택
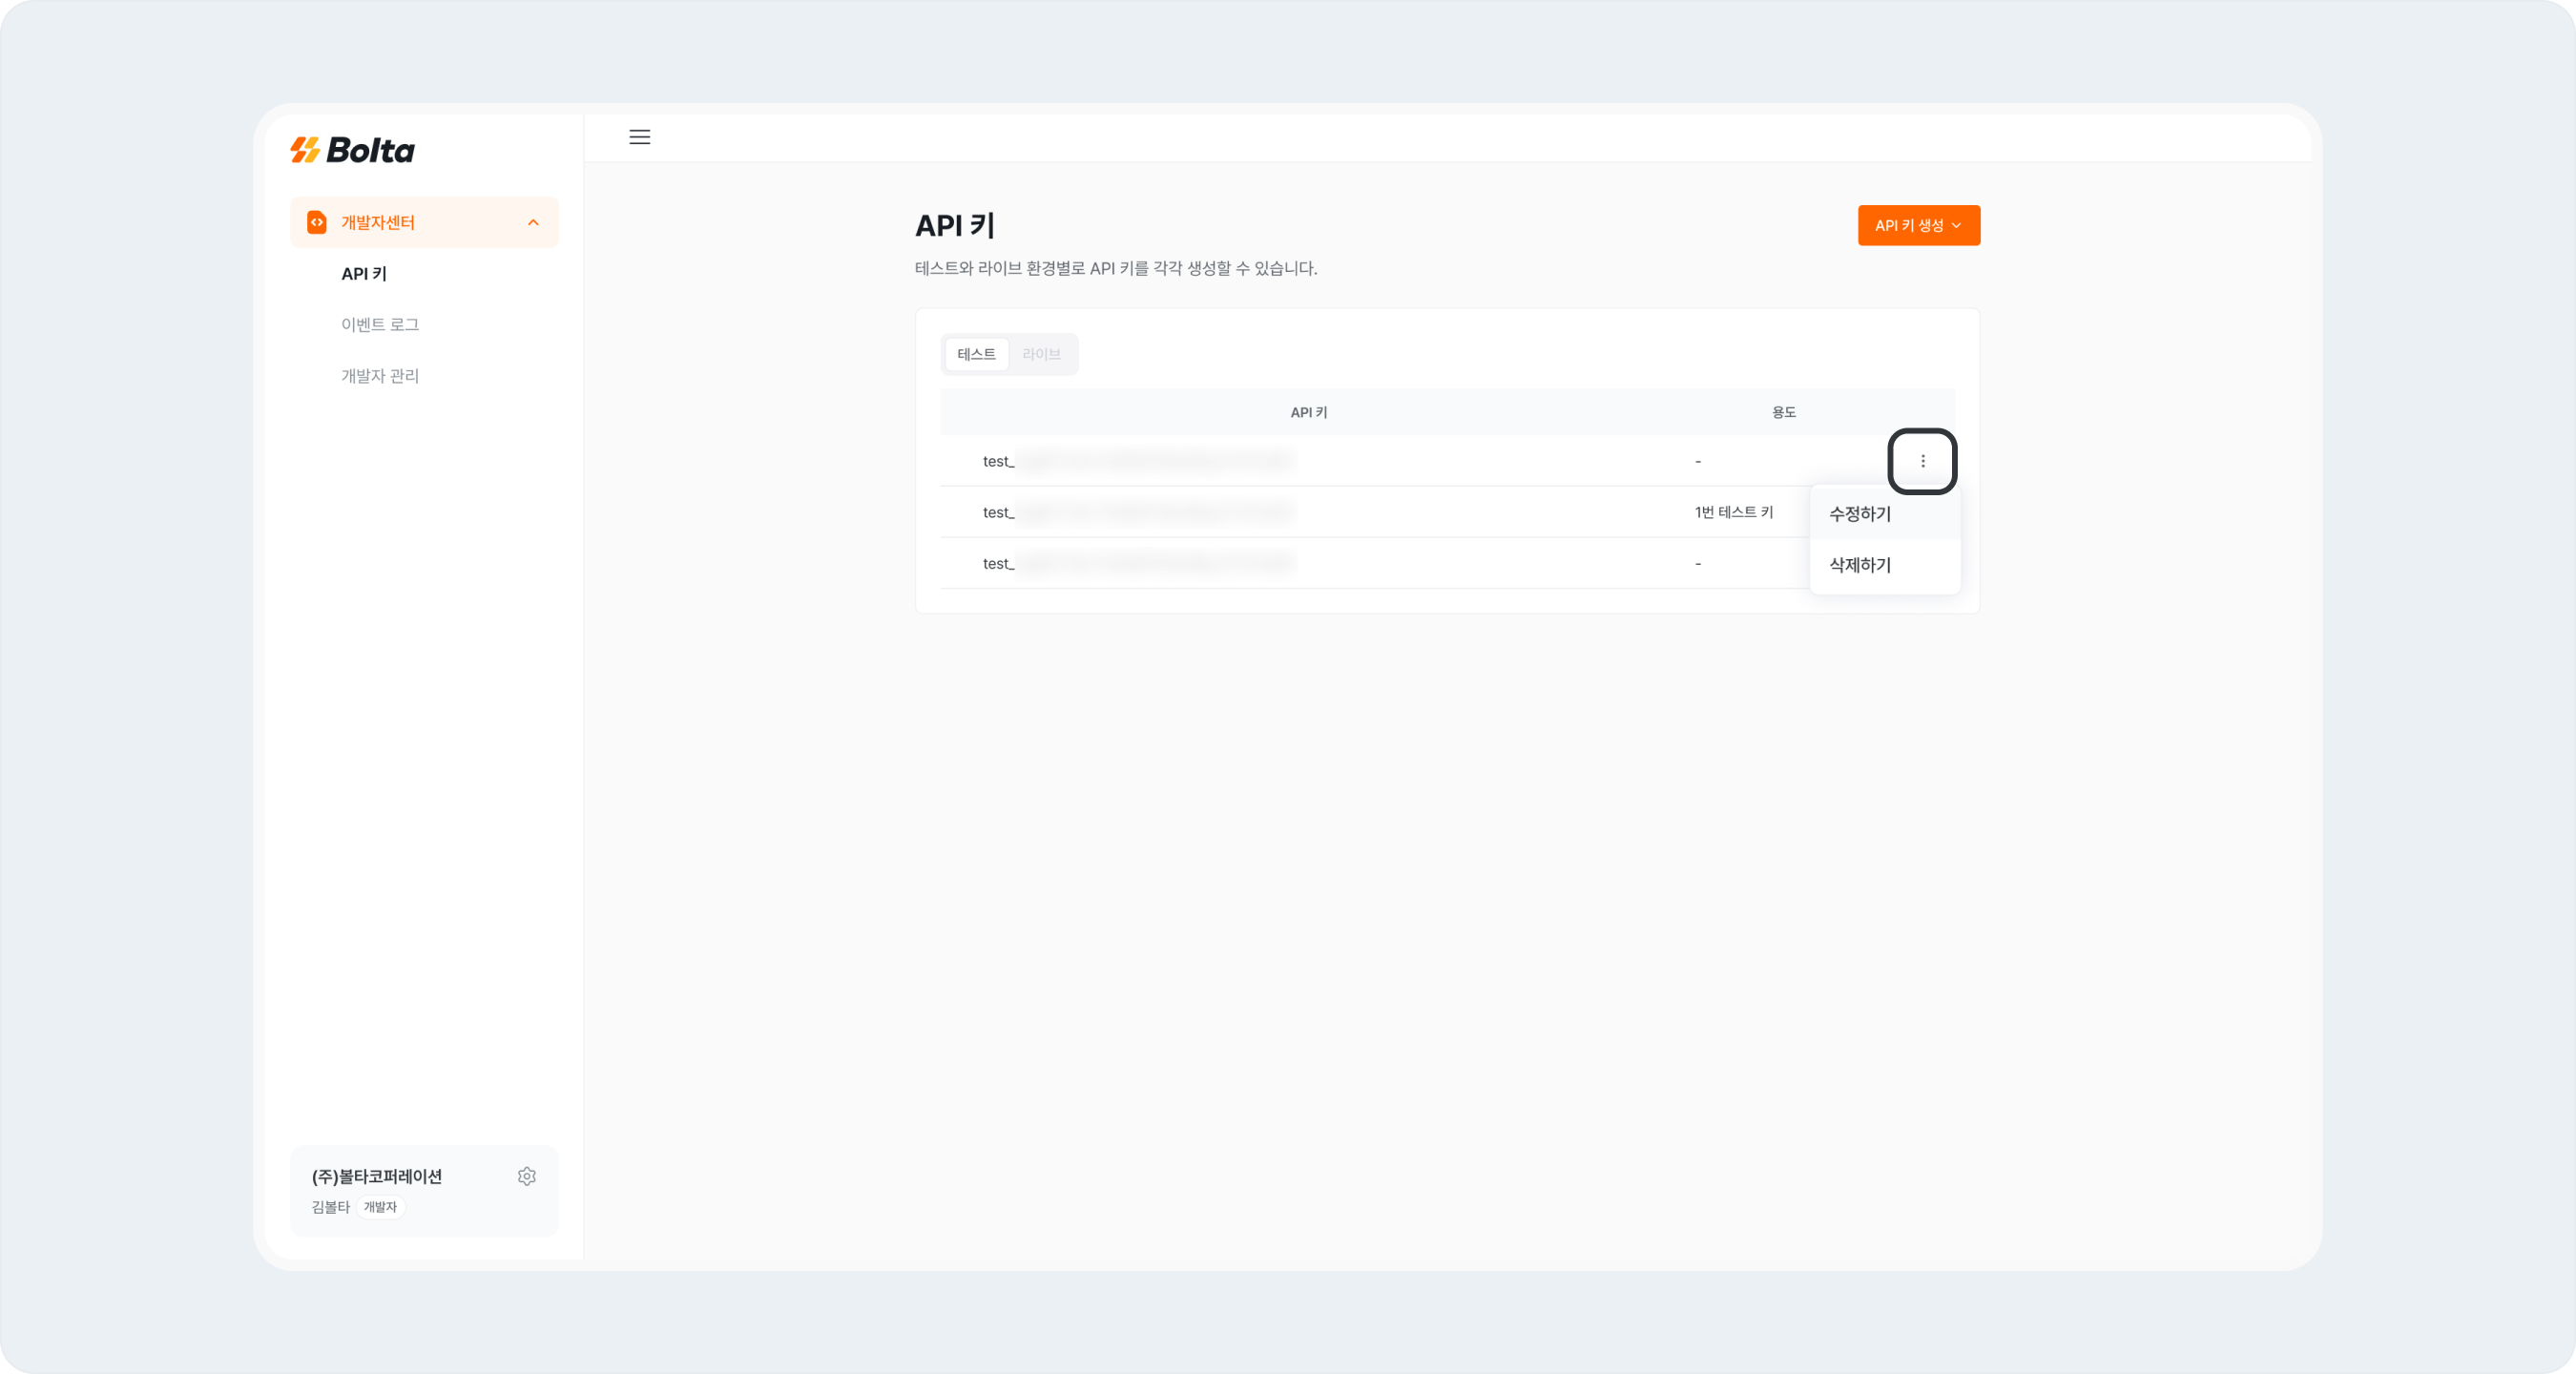
**\[API 키]** 화면에서 웹훅을 연결할 테스트 or 라이브 키를 확인해 주세요.
그런 다음 API 키 우측 **\[더보기] 아이콘**을 클릭 후 **\[수정하기]** 를 선택해 주세요.
 # 2. 웹훅 URL 설정
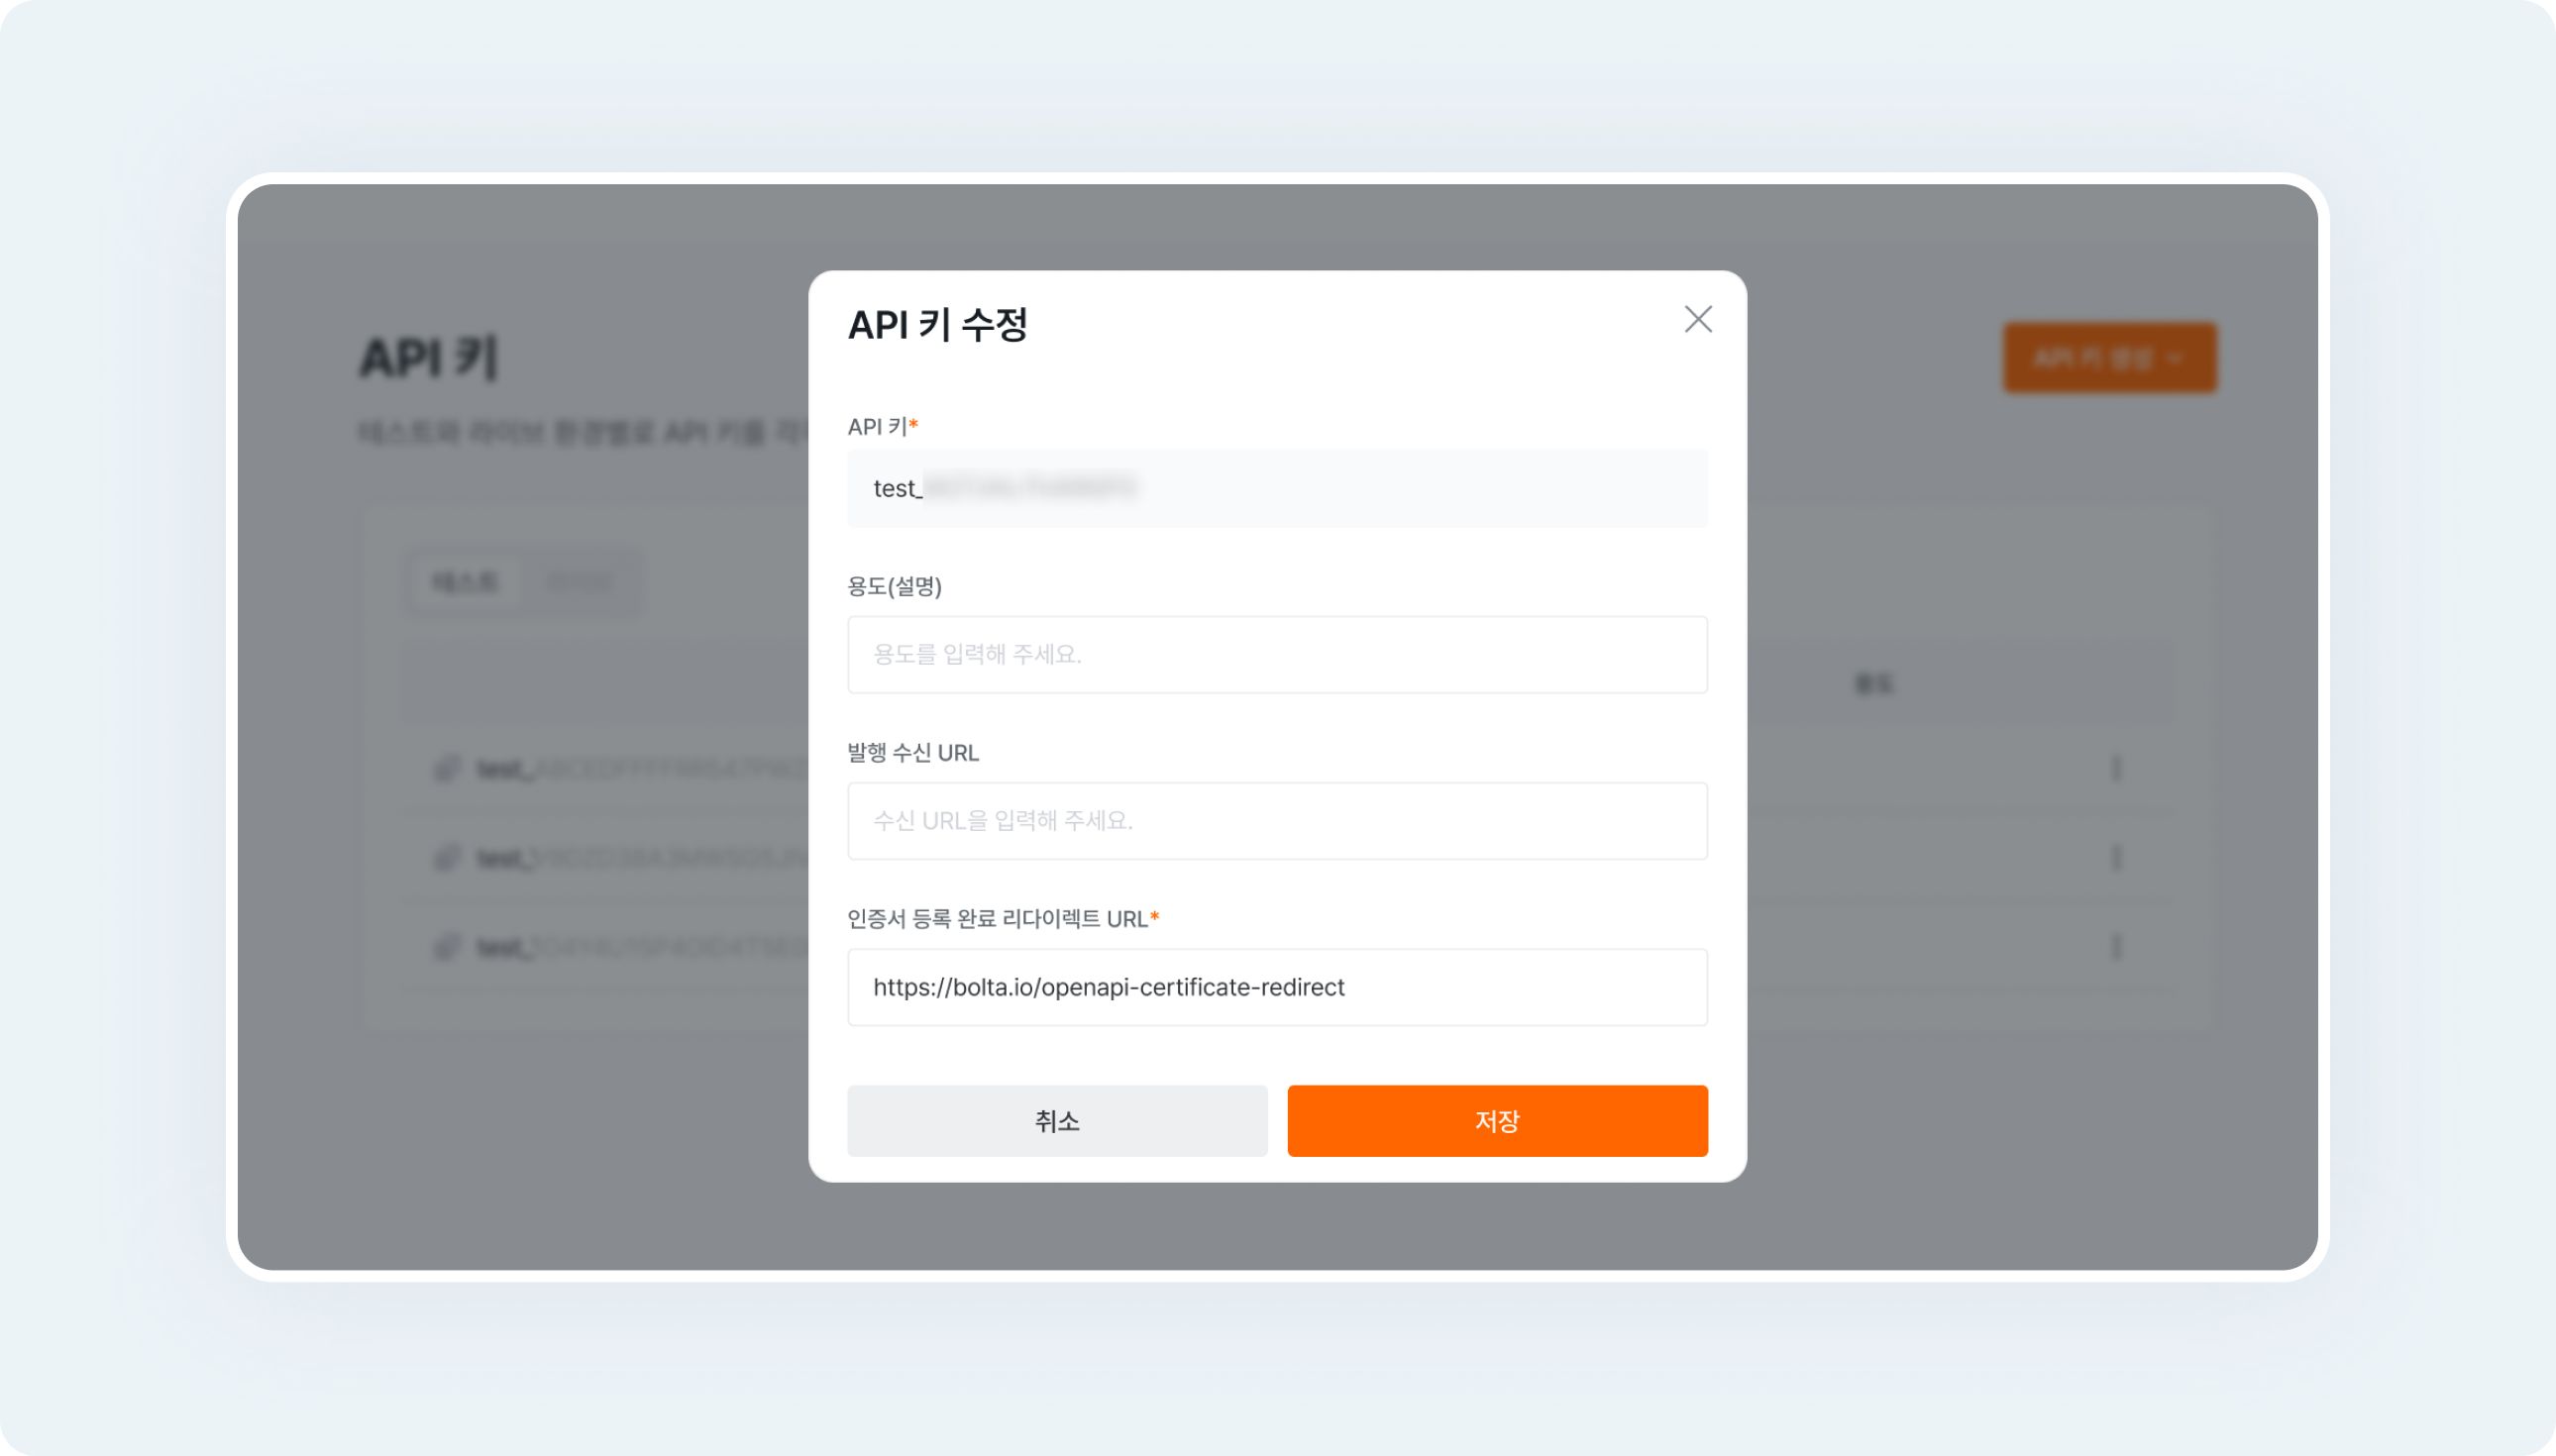
API 키 수정 화면에서 웹훅 연결에 필요한 발행 수신 URL과 인증서 등록 완료 리다이렉트 URL을 입력해 주세요.
그런 다음 하단 **\[저장]** 버튼을 클릭하면 API 키에 웹훅 연결이 완료됩니다.
> 리다이렉트 URL은 지정된 기본값으로 설정되어 있습니다. 역할과 등록 흐름은 [인증서 등록 연동](/docs/api-introduction/certificate-registration)을 참고하세요.
# 2. 웹훅 URL 설정
API 키 수정 화면에서 웹훅 연결에 필요한 발행 수신 URL과 인증서 등록 완료 리다이렉트 URL을 입력해 주세요.
그런 다음 하단 **\[저장]** 버튼을 클릭하면 API 키에 웹훅 연결이 완료됩니다.
> 리다이렉트 URL은 지정된 기본값으로 설정되어 있습니다. 역할과 등록 흐름은 [인증서 등록 연동](/docs/api-introduction/certificate-registration)을 참고하세요.