> ## Documentation Index
> Fetch the complete documentation index at: https://docs.bolta.io/llms.txt
> Use this file to discover all available pages before exploring further.

# 고객 정보 등록

> 볼타에서는 고객 정보를 등록해서 관리할 수 있습니다.

# 1. 고객 관리

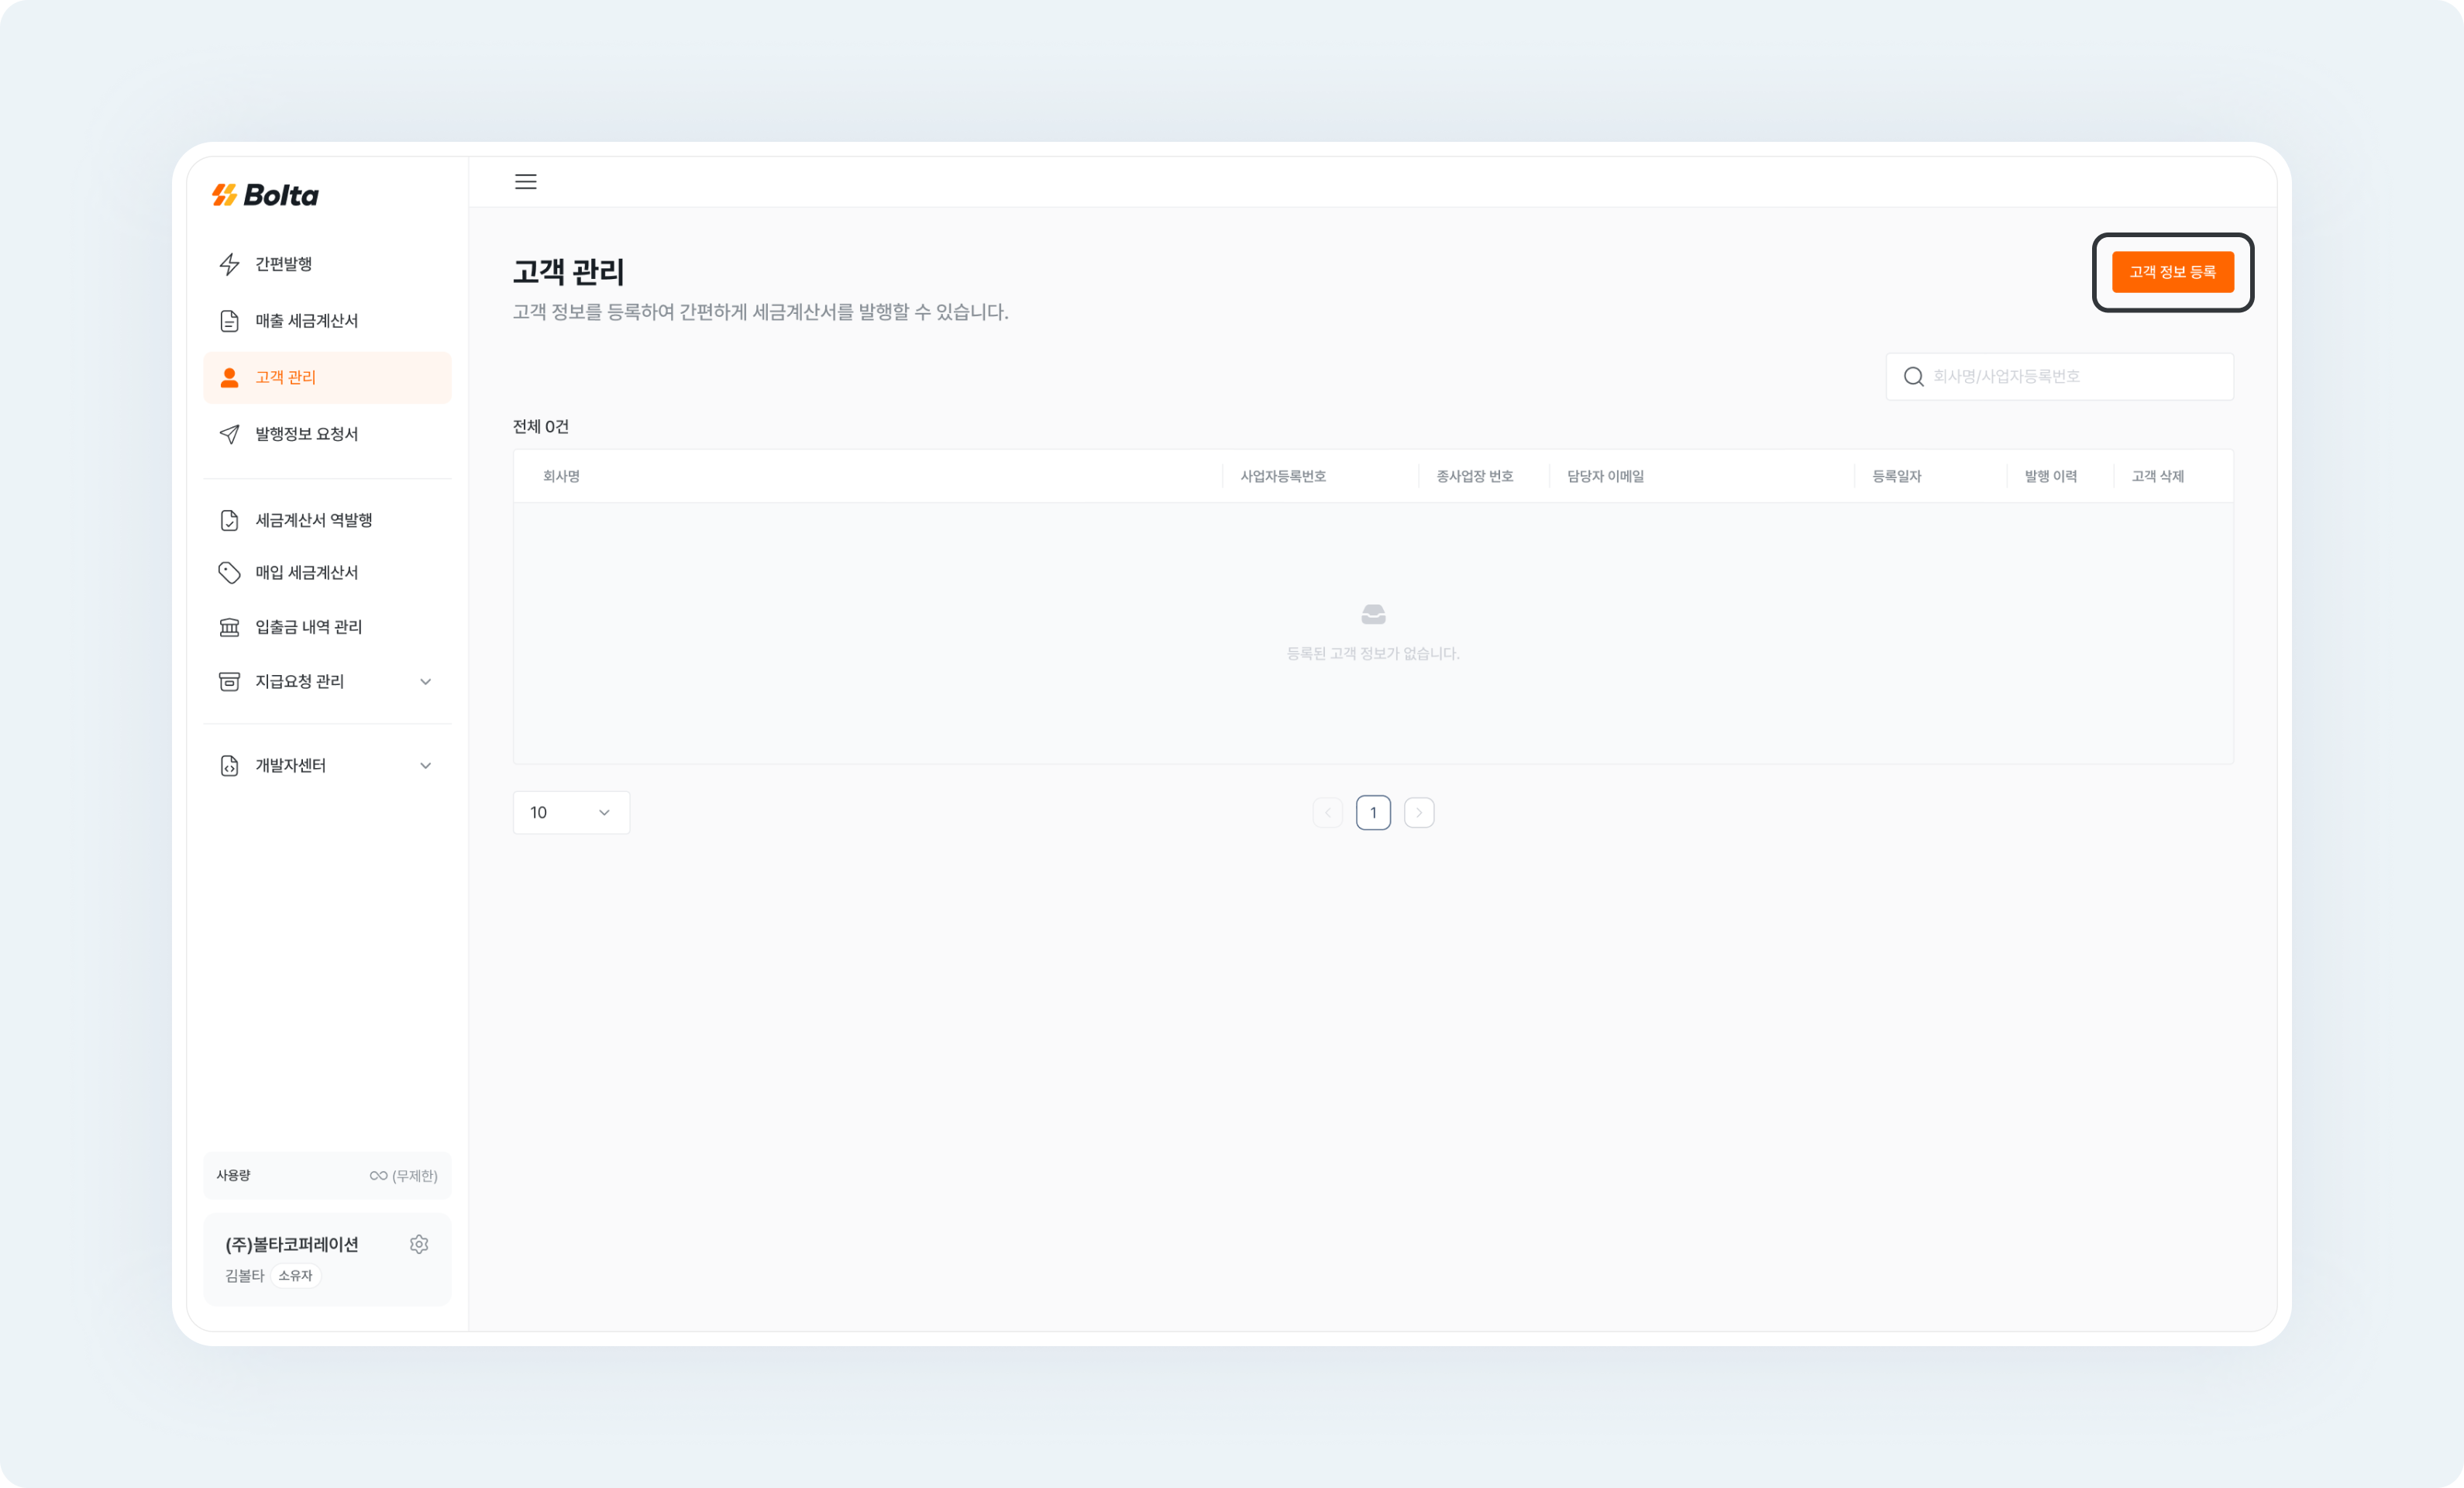
\[고객 관리] 메뉴를 선택 후 우측 상단의 \[고객 정보 등록] 버튼을 클릭해 주세요.
<img src="https://mintcdn.com/bolta/NYFZkgxpROncMbXN/images/docs/customer-creation__manage-customer.png?fit=max&auto=format&n=NYFZkgxpROncMbXN&q=85&s=74de65f927abab69428b5aaa1a5ddb64" alt="customer creation manage customer" width="3180" height="1920" data-path="images/docs/customer-creation__manage-customer.png" />

# 2. 정보 작성

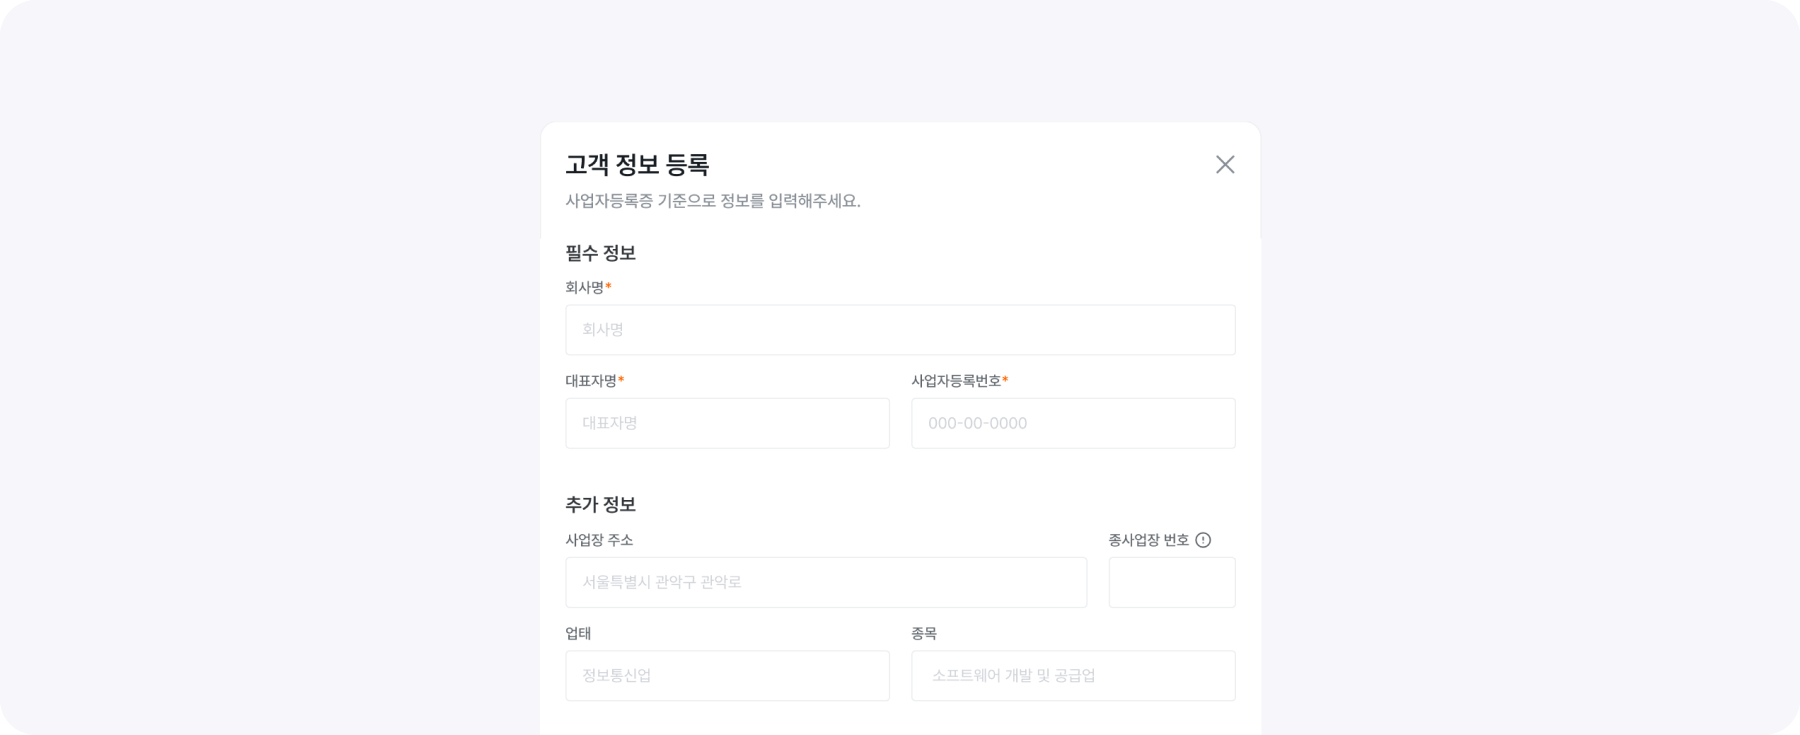
고객 정보 등록 팝업에서, 필수 정보와 추가 정보를 작성할 수 있어요.

> 세금계산서 발행 시, 공급받는자의 정보로 들어가는 내용이에요.
<img src="https://mintcdn.com/bolta/NYFZkgxpROncMbXN/images/docs/customer-creation__fill-customer.png?fit=max&auto=format&n=NYFZkgxpROncMbXN&q=85&s=eba3841726aa4718fffa1072cca0fa6f" alt="customer creation fill customer" width="1800" height="735" data-path="images/docs/customer-creation__fill-customer.png" />

# 3. 담당자 정보 작성

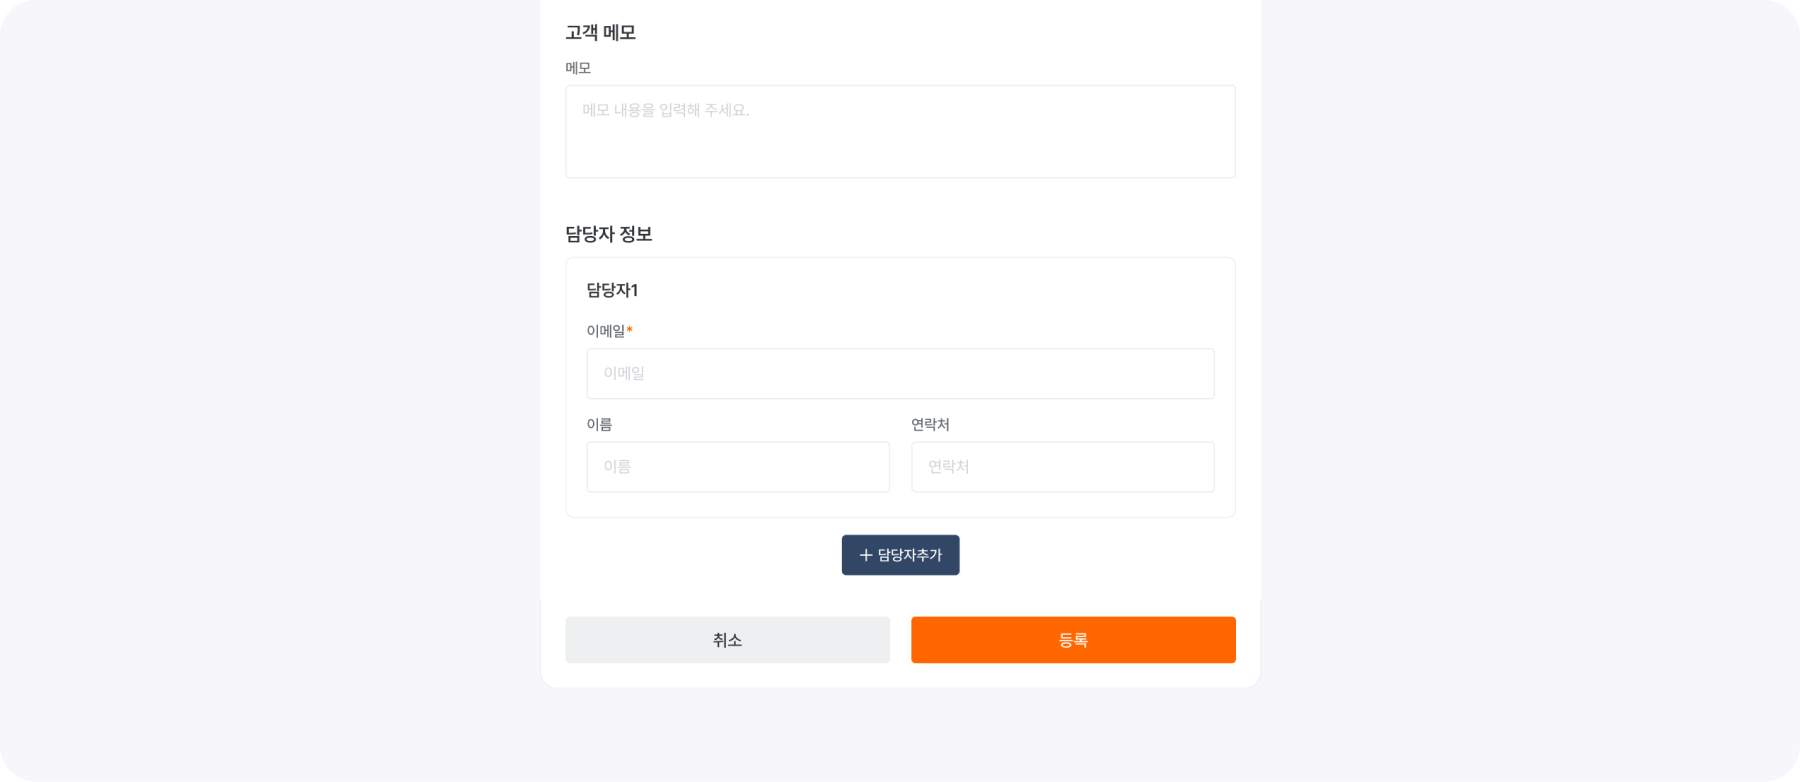
고객 정보 등록 팝업에서 담당자 정보도 최대 5개로 추가할 수 있어요. 등록된 고객정보는 언제든 \[간편발행]에서 바로 불러와서 발행할 수 있어요.
<img src="https://mintcdn.com/bolta/NYFZkgxpROncMbXN/images/docs/customer-creation__fill-manager.png?fit=max&auto=format&n=NYFZkgxpROncMbXN&q=85&s=5289c80ca0e192d7233a05ca755973e3" alt="customer creation fill manager" width="1800" height="782" data-path="images/docs/customer-creation__fill-manager.png" />
